Let’s be honest. Most people look at a vaulted or cathedral ceiling and think, "Wow, that looks airy." Then they try to put trim up. Suddenly, they're staring at a compound miter saw with tears in their eyes because the math just isn't mathing. Installing crown moulding on angled ceiling transitions is basically the final boss of home renovation. It’s not just about cutting wood; it’s about geometry that feels like it’s trying to prank you.
If you’ve ever tried to run standard crown along a wall that meets a sloped ceiling, you know the gap. That giant, ugly, triangular void where the trim refuses to sit flush. It’s a mess. Most DIYers—and even some pros who should know better—end up globbing two inches of caulk into the seam and hoping the homeowner never looks up with a flashlight.
But it doesn't have to be a disaster.
The Physics of the "Dead End" Problem
The core issue with crown moulding on angled ceiling runs is that crown is designed to sit at a 45-degree (or 38-degree) spring angle against two flat, perpendicular surfaces. When one of those surfaces starts tilting up at 20 degrees, the "spring" of the moulding no longer hits the ceiling. You’re trying to marry a flat plane to a sloped one.
Think about it this way.
Standard crown sits on "flats." When you hit a pitch, the profile of the wood literally changes its footprint. If you try to turn a corner from a flat wall to a sloped one, the patterns won't match. It’s like trying to zip up a jacket where one side of the zipper is longer than the other. You’ll get to the top and have a leftover piece that doesn't go anywhere.
Why You Can't Just "Miter It"
I’ve seen people spend four hours at the saw trying to find the "magic angle." They’ll try 22.5 degrees. They’ll try 45. They’ll try some weird 12.7-degree tilt they found on a forum from 2004.
The truth? You cannot miter your way out of a geometric impossibility.
If the ceiling is sloped, a standard miter joint will always leave a "shiner"—an exposed edge of the wood profile. This is why most high-end trim carpenters, like the folks you see on This Old House or the Gary Katz tutorials, rarely recommend a direct miter for these transitions. Instead, they use a transition block or a "birdsmouth" cut. It’s about creating a landing pad for the trim so the eye doesn't catch the discrepancy.
The Three Real Ways to Fix the Gap
You’ve basically got three choices when dealing with crown moulding on angled ceiling setups. None of them are "easy," but some are definitely less painful than others.
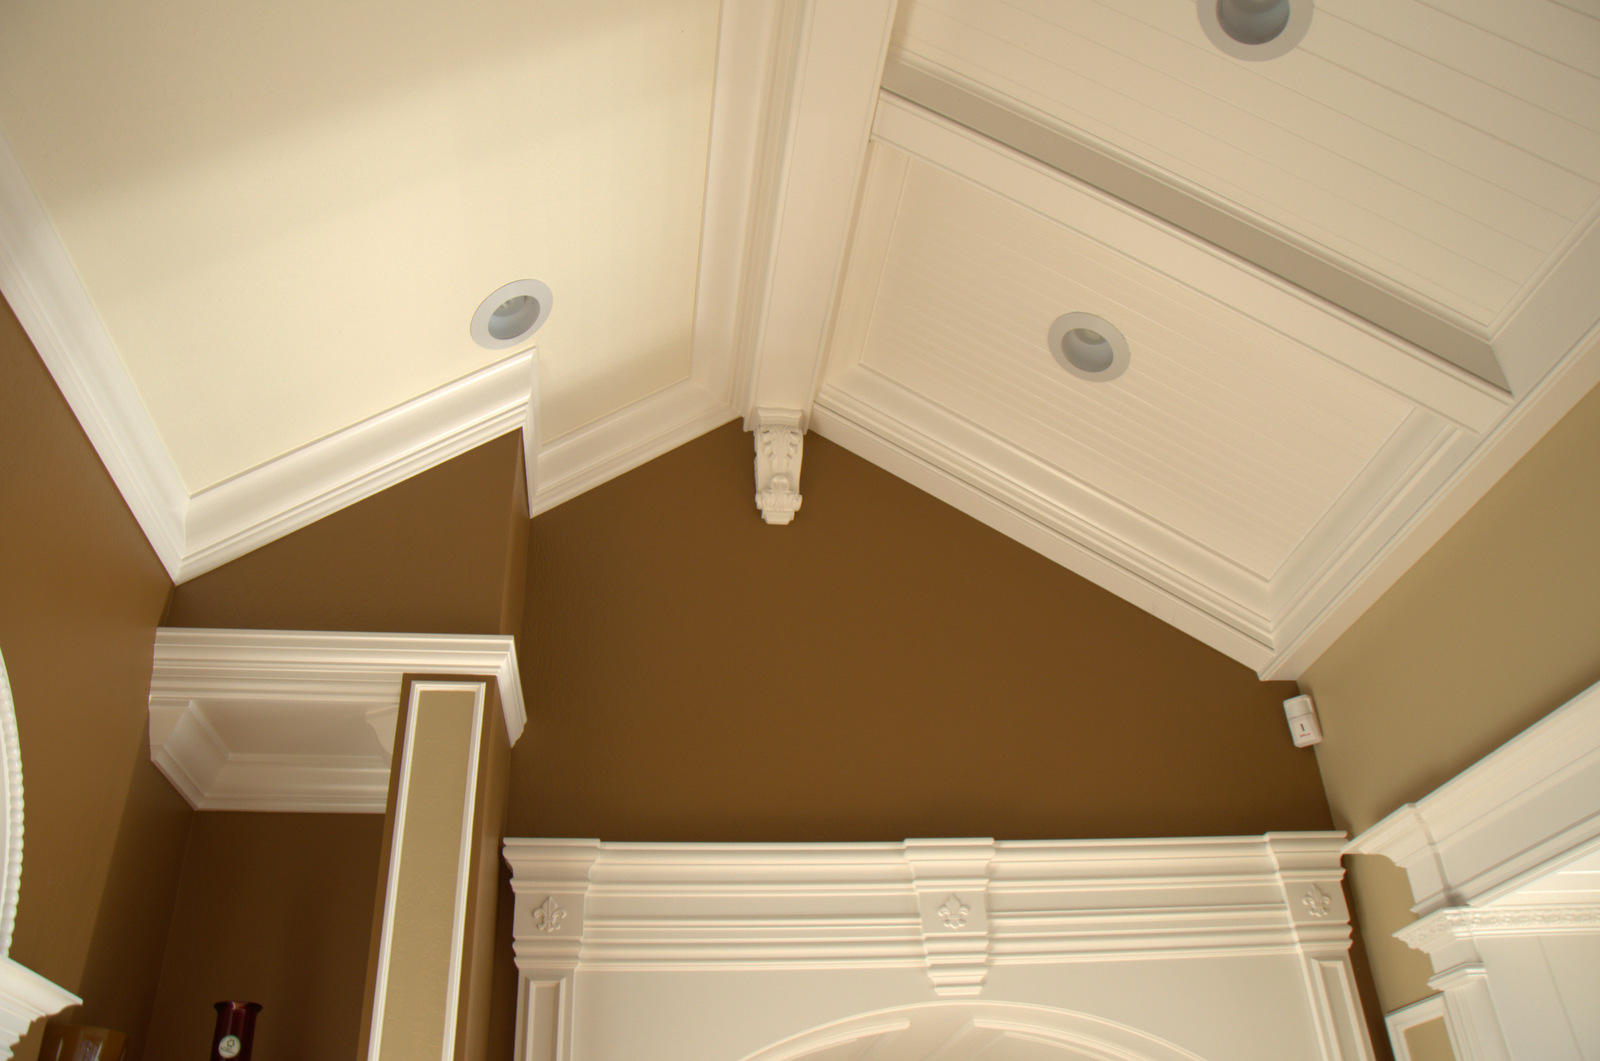
1. The Plinth or Transition Block Method
This is the "cheat code" used by 90% of builders. Instead of trying to make the trim turn the corner, you install a decorative block at the point where the flat wall meets the slope. The horizontal crown runs into the side of the block. The sloped crown runs into the top of the block. Because both pieces end against a flat surface, you don't have to worry about matching the profiles. It looks intentional. It looks "custom." Most importantly, it saves you from throwing your saw across the yard.
2. The Horizontal Wrap (The "Return")
This is for the purists. Instead of following the slope up the ceiling, you keep the crown moulding level all the way around the room. This creates a "ledge" effect. On the vaulted sides, the crown sits on the wall, but there’s a gap between the top of the wood and the actual ceiling. This is where people often hide LED strip lighting. It looks incredible, but it means your "ceiling" trim isn't actually touching the ceiling.
3. The Compound Birdsmouth
Don't do this unless you are a masochist or a master carpenter. This involves cutting a notch into the back of the moulding so it can "lean" into the slope. You’re essentially reshaping the wood to trick the eye. It requires a compound miter saw, a protractor, and probably a bottle of aspirin.
Tools You Actually Need (Not Just the Basics)
You can't do this with a miter box and a hand saw. You just can't.
If you’re tackling crown moulding on angled ceiling transitions, you need a digital angle finder. Not a plastic one from the bargain bin. A real, digital Bosch or Wixey protractor. Why? Because your house isn't square. Even if the blueprints say "22.5 degrees," the drywall guy probably added a half-inch of mud in the corner, making it 23.1. In the world of crown, a 0.6-degree difference is the difference between a tight joint and a gap you can see from space.
- A Compound Miter Saw: 12-inch is better because it handles wider crown nested.
- Collated Brad Nailer: You need one hand to hold the trim and one to fire.
- Copied Jigsaw: For "coping" the joints rather than mitering them.
- Shim stock: Lots of it.
The Secret of the "Backer Board"
Here is something most "Top 10 Home Tips" articles won't tell you. When you’re putting crown moulding on angled ceiling areas, you have nothing to nail into.
In a standard room, you nail into the top plate of the wall and the ceiling joists. On a vaulted ceiling, the joists are running at an angle away from you. You might fire a two-inch nail and hit nothing but air and insulation.
The pro move? Install a "backer board" first. Rip a piece of 2x4 at the same angle as your crown’s spring angle. Screw that into the wall studs first. Now, you have a solid wood "triangle" running the length of the room. When you go to install your expensive trim, you can nail it anywhere. It’s rock solid. It won't sag in three years when the house settles.
Dealing with Vaulted Peaks
What happens when you get to the very top of the cathedral? The "Peak."
This is where people lose their minds. If you have a 12/12 pitch, you’re looking at a very sharp point. If you try to miter two pieces of crown here, the "long" point of the miter will be six inches long. It’s fragile. It splits.
The secret here is a "Peak Block." Just like the transition block we talked about earlier, a decorative finial or a simple square block at the apex of the vault gives the trim a place to die. It stops the eye. It also covers the fact that the two slopes of your roof are almost certainly not perfectly symmetrical.
Material Choice Matters More Than You Think
Don't buy MDF for vaulted ceilings.
I know, it’s cheap. It’s pre-primed. But MDF is heavy and it has zero structural integrity. When you are fighting gravity on a 12-foot high angled run, you want something light. Finger-jointed pine is the sweet spot. It’s rigid enough to hold its shape over long spans but light enough that a couple of 18-gauge brads will actually hold it while the glue dries.
If you’re really struggling, look into polyurethane trim (like Fypon). It’s basically high-density foam. You can cut it with a butter knife, and it weighs nothing. On a steep angle, being able to hold a 16-foot piece of trim with one hand while you’re 10 feet up a ladder is a literal life-saver.
Actionable Steps for Success
If you're starting this project tomorrow, stop reading the "theory" and do these three things:
- Build a Mock-up: Take two 12-inch scraps of your crown. Try to join them at the exact angle of your ceiling. Do this on your workbench, not on a ladder. If you can't make it work on the bench, you won't make it work on the ceiling.
- Find the True Angle: Use your digital protractor. Measure the wall-to-ceiling angle in at least four different spots. Take the average.
- The "Scarf" Joint: On long vaulted runs, you’ll likely need more than one piece of wood. Never butt them together. Use a scarf joint (a 45-degree overlapping miter). This hides the seam much better when the wood expands and contracts with the seasons.
Crown moulding on angled ceiling installs are a test of patience. Most of your time should be spent measuring and thinking, not cutting. If the saw is running more than your brain is, you’re probably making a mistake. Tighten your measurements, use a backer board, and don't be afraid to use transition blocks. There’s no shame in making a project easier on yourself if the end result looks like a million bucks.
Identify the "dead end" spots where the slope starts. Install your transition blocks first. Measure from block to block. Cut your horizontals. Then, and only then, tackle the sloped pieces. By breaking the room into "flat" and "angled" zones, you turn a geometric nightmare into a series of manageable tasks. Once the caulk is dry and the paint is on, nobody will know you used a "cheat" block. They’ll just see a room that looks finished.